Admins can create a survey form on the platform by using a template, starting from scratch, or copying an existing survey form.
Create a survey from a template
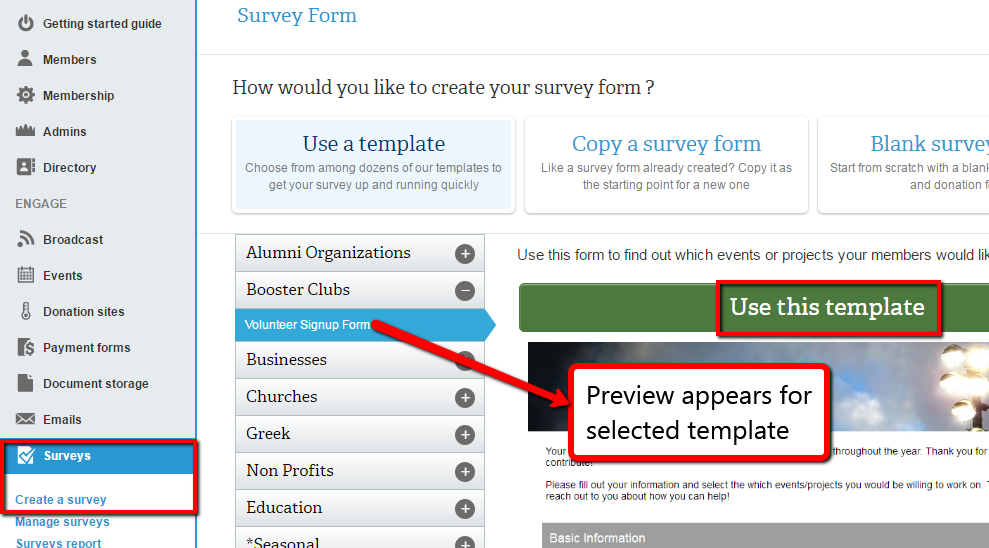
- On the left navigation bar, click on Surveys
- In the submenu, select Create a Survey
- Select a template from the available options
- Click on the row of the + sign to expand the category. A preview will appear to the right of your selection.
- Once you have found the template you want to use, click the Use This Template button
Create a survey from scratch
If you want to completely customize your survey form instead of starting from a template, start with a blank survey form.
- On the left navigation bar, click on Surveys
- In the submenu, select Create a Survey
- Click Blank Survey Form on the top right

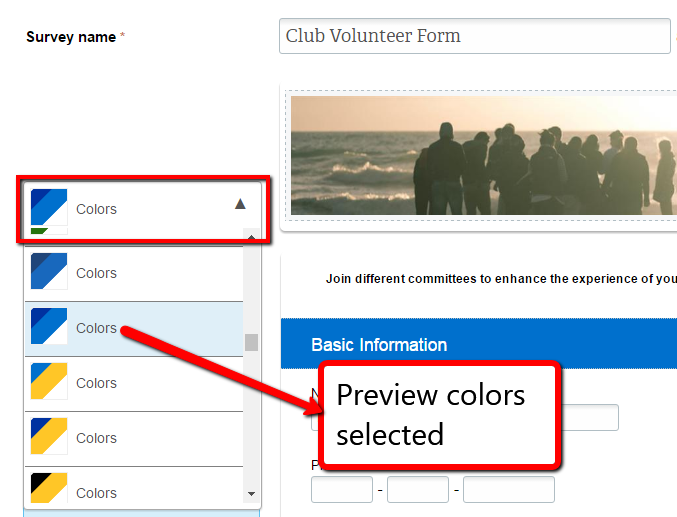
Customize the look of a survey
These next steps allow admins to choose a specific color palette and upload a banner -- ideal identifiers for brand recognition and consistency.
- Click the Colors dropdown menu
- Select a color palette from the available options
- A preview of the colors selected will appear to the right.
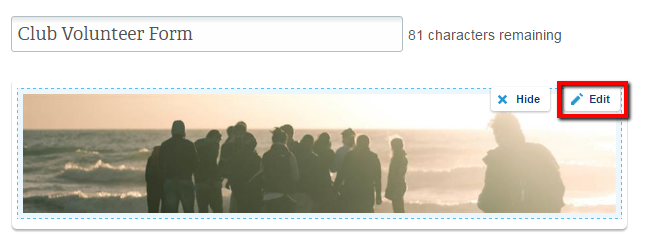
- Hover over the banner image section and click on the Edit button that appears
- In the overlay that appears, drag and drop your desired photo into the allotted area, or click to browse and upload
Note: The recommended image size is 900 px wide.
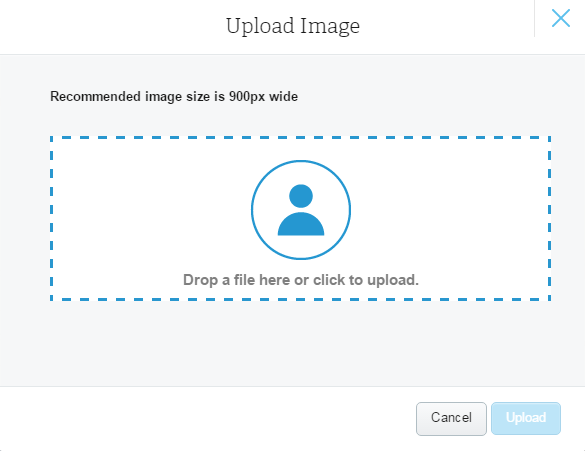
- Click the Upload button
Structure your survey and determine what info to collect
Admins have a variety of options available to customize the structure of a survey, use different input field types, and further define field options.
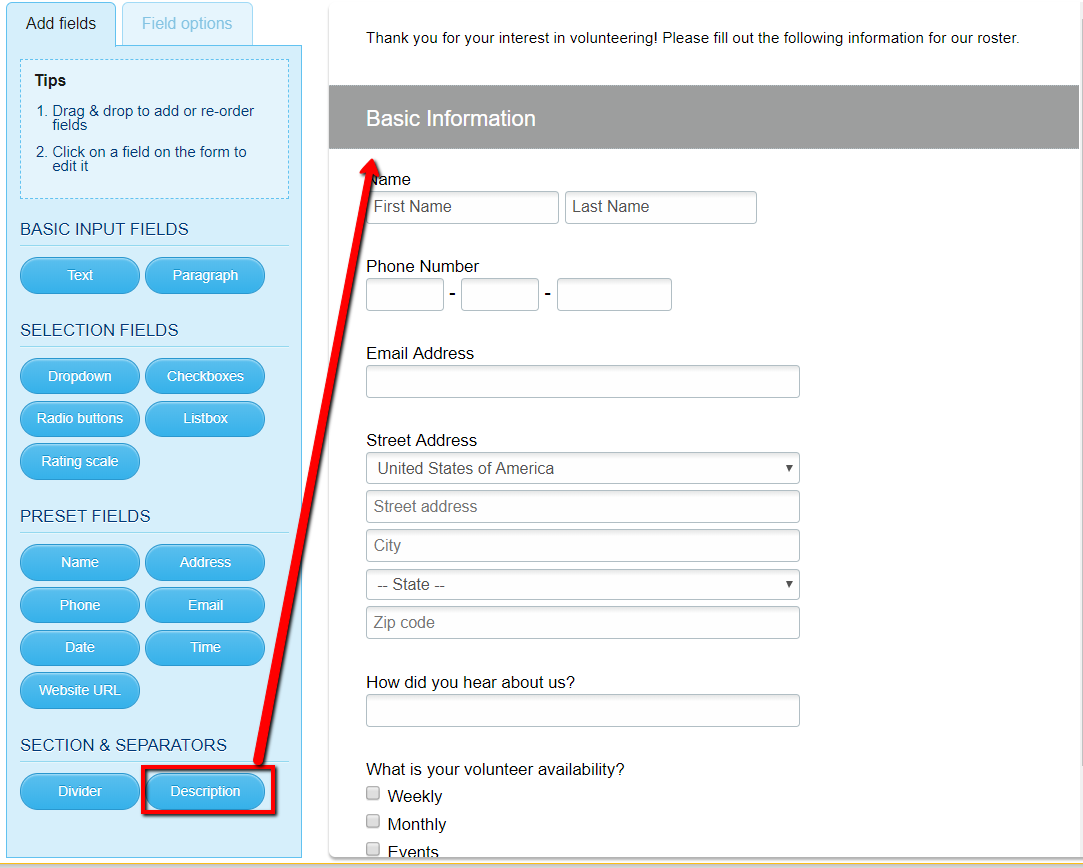
On the Add Fields tab, you have the option to drag and drop four different types of fields into their survey preview:
Basic: text or paragraph
Selection: dropdown, radio buttons, etc.
Preset: name, address, etc.
Section & Separators: divider or description
- The description field is where you can include a hyperlink to your terms of use or privacy statement to make it easily accessible. If you are collecting personal information from European citizens, you must do this to comply with the General Data Protection Regulation (GDPR).
- Be sure to add your terms of use or privacy statement on the relevant page like above where your members provide their personal information.
- Add a new field by dragging it from the Add Field tab and dropping it onto your survey form preview on the right. It will embed where you drop it.
Note: On the survey form, you can select fields, including section headers, and drag and drop them to reposition them.
- Use the Field Options tab to label, assign default values, and add notes to each field
- Click on the field you want to edit and fill in the corresponding text boxes appearing on the left.
Optional steps to request explicit consent for GDPR compliance:
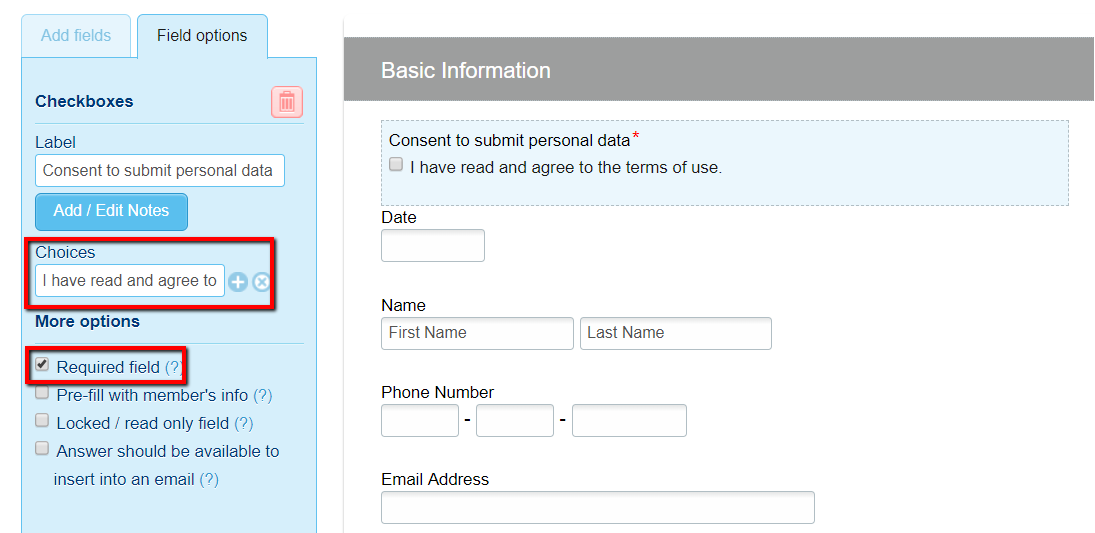
- To add a required checkbox to ask for consent to process personal information, drag the Checkboxes field to the applicable section.
- Modify the Choices field to offer a selection that the user gives consent to process personal data.
- Make this a required field by clicking the box next to Required Field.
- To add an e-Signature and date fields, drag and drop a basic text field and date field to the applicable sections. Make these required fields.
Note: Certain types of fields can only be pre-filled with certain types of member info. For example, you must add a Name field to your form; you cannot pre-fill the member's name into a Basic Text field.
- Remove a field by selecting it on your form and clicking the trash icon located on the Field Options tab
- Once your survey is complete, click Save & View More Options or Save & Publish Now
Both options will bring you to the survey admin page options. If you choose to publish, your form will be live, but you are welcome to continue editing on the admin page.
Important note: Once you have already started collecting survey responses, deleting any information fields on your form will cause all responses connected to that field to be deleted.
Get the URL to share your survey
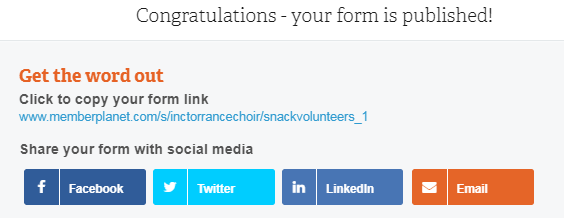
After you’ve finished creating and publishing your survey, you’ll want to get the word out and share it. As soon as you publish, an overlay will appear with your published link as well as social media and email sharing options.
You can also view and get the link to your survey at anytime by following these steps:
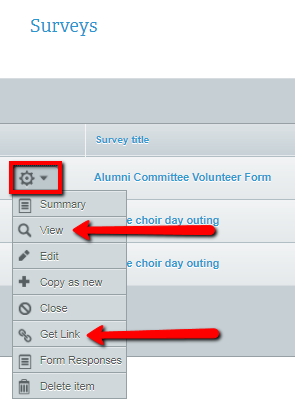
- On the left navigation bar, click on Surveys
- Click Manage Surveys in the submenu
- Select the gear icon next to the survey title you wish to get the link for
- In the submenu, click View or Get Link
Survey forms are trackable and responses are automatically sorted into reports for viewing in platform or exporting to Excel. View the responses that users submitted in a survey, such as who signed up to volunteer, or feedback for an event.
Each survey you create will have a unique admin page with individual data. Admins have access to these features:
Close an open survey form or set close date
Customize the message shown when the survey form has closed
Create a survey button for your email campaigns
Create a survey button for your external website
Share this survey form with leaders in another group
- On the left navigation bar, click on Surveys
- Select the gear icon next to the form that you would like to see responses from
- Click Form Responses in the dropdown menu
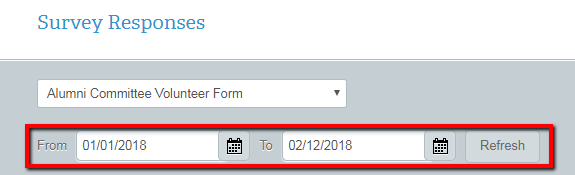
- Adjust the date range and click the Refresh button to view results from a specific period of time
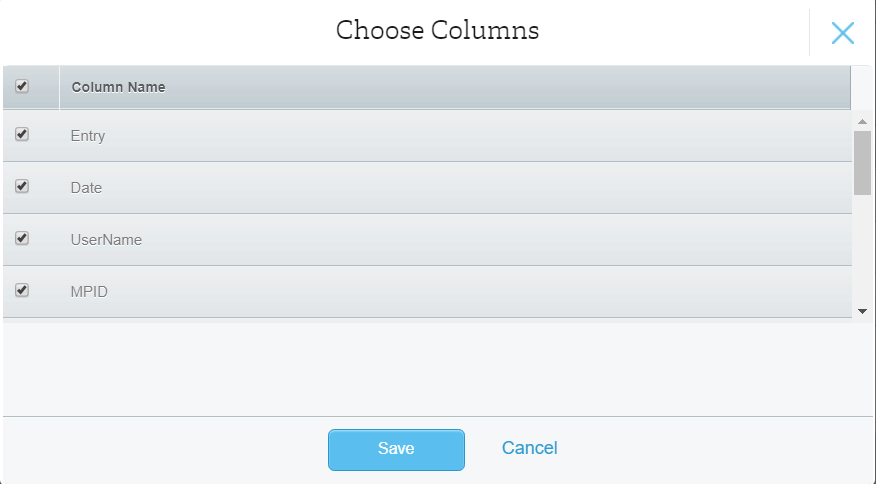
- You can also click the Choose Columns button at the top right to modify which columns to display. In the overlay that appears, uncheck the columns you wish to remove from the display, then click Save.
Viewing options: You can sort columns by clicking on headers at the top of table. You also can filter by dates. The Export Table button allows you to export your form responses to an Excel spreadsheet. (For more advanced sorting and filtering options, including pivot tables as well as a more expanded view, we recommend you export your database to Excel.)